 Every now and again it is necessary to manually install a plugin for WordPress, instead of going through the automatic process that is provided in the plugin dashboard. Especially if you are looking for a particular plugin by name, WordPress will not always find the exact one you’re interested in, however you have access to the download through the plugin website.
In this example I will be installing the Add Google Plus One Social Share plugin to one of my old websites. While I don’t believe this is one that cannot be accessed through the plugins dashboard in WordPress, for demonstration purposes, I will be installing this manually.
To install plugins, or any other WordPress component manually, you will need an FTP program, such as FileZilla, which is free and available at http://filezilla-project.org. You will also need FTP access to your blog, meaning an FTP user name, password and directory, if applicable. This tutorial is not intended to provide instruction on how to use an FTP client, but the various applications that are available do provide training and tutorials on how to use their product. I am using the FTP access within Dreamweaver, but most FTP programs operate in much the same manner, so you can get the general idea.
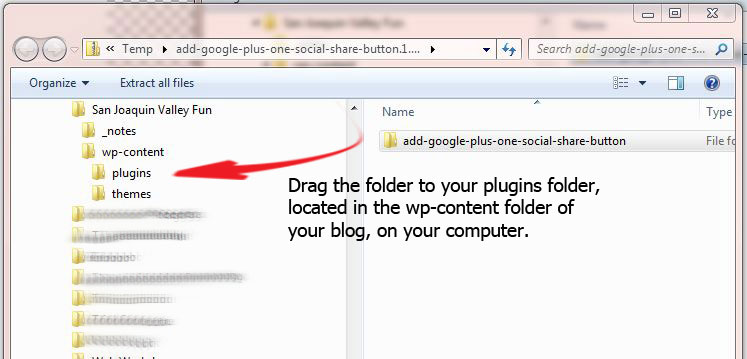
From the website of the plugin that you wish to install, in this case the Google Plus One share button, download the file to your computer. This will most likely be a .zip file, which you would then extract to the plugins folder of your theme.

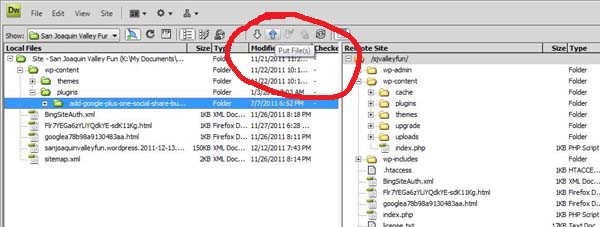
You will then upload this folder, via FTP to your blog.

Many FTP programs call this action “Put”, but you are essentially uploading the file. It will automatically go in the correct directory, if you have the hierarchy set up properly on your local computer.
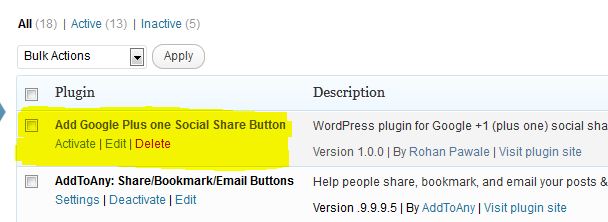
Once you have put the file, navigate to your Plugins dashboard within WordPress, and you will see it there, ready to be activated and implemented on your blog.

Click the “Activate” link directly below the title, then you can proceed configuring any settings that may be particular to that plugin.
You can use FTP for other things as well, such as uploading images to a specific directory in your blog, if you need them to go to a folder that is different than the default locations. For example, the blog theme I use primarily, Atahualpa, requires that images in the header be uploaded to a particular location, so that the theme can display the images. If you were to use the default method of uploading photos to your blog through the Media dashboard, it will put the images in a default location, such as /wp-content/uploads/2012/01, therefore the theme could not find the images it needs to properly render the header.
Got questions? Please post them in the comments below and I’ll do my best to answer them for you!


